To open the Custom Scoring panel, click the scoring button in the top-right corner of the Canvas — the same button used for Numeric Scoring.
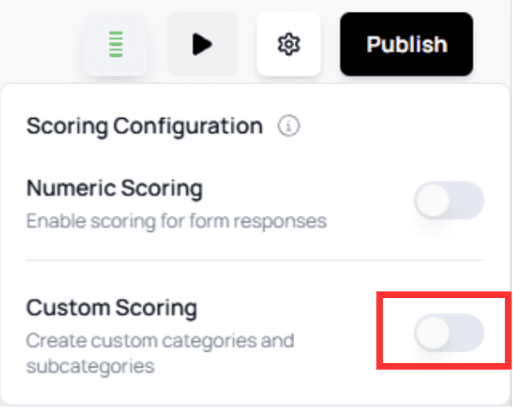
Toggling Custom Scoring will reveal the configuration interface, including the ability to create Categories and Subcategories.
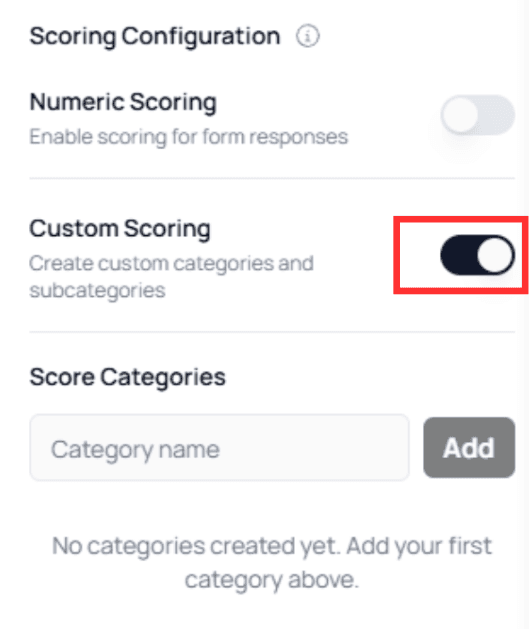
Creating Categories
To add a new category:
Type the category name
Click Add
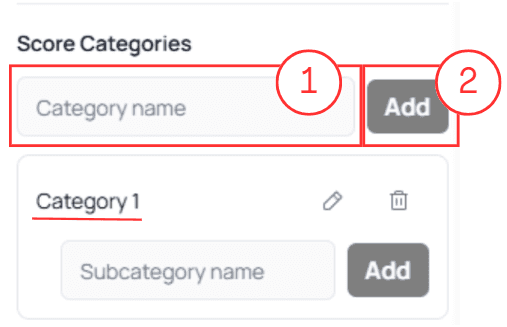
Once created, each category includes several actions:
Edit

Delete

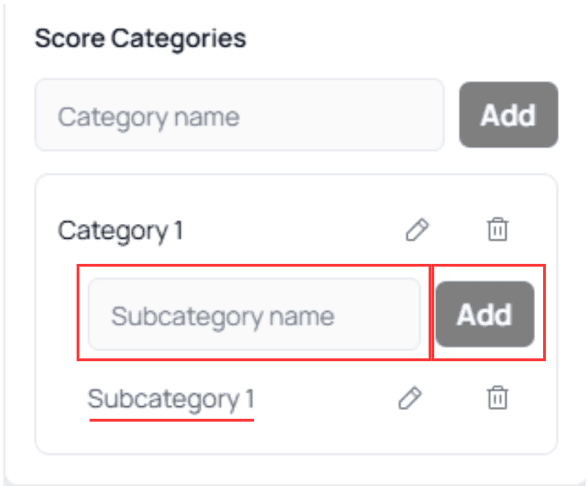
Add Subcategories

To add a subcategory, simply type the name under the main category and click Add.
💡 Tip:
Categories help you classify answers (e.g., “Heart Risk”).
Subcategories help refine the classification (e.g., “Low,” “Medium,” “High”).
How Custom Scoring Works with Form Elements
Like Numeric Scoring, Custom Scoring applies to:
- Multiple Choice nodes
- Dropdown nodes
When enabled, each option receives a Category Selector used to assign a category or subcategory to that option.
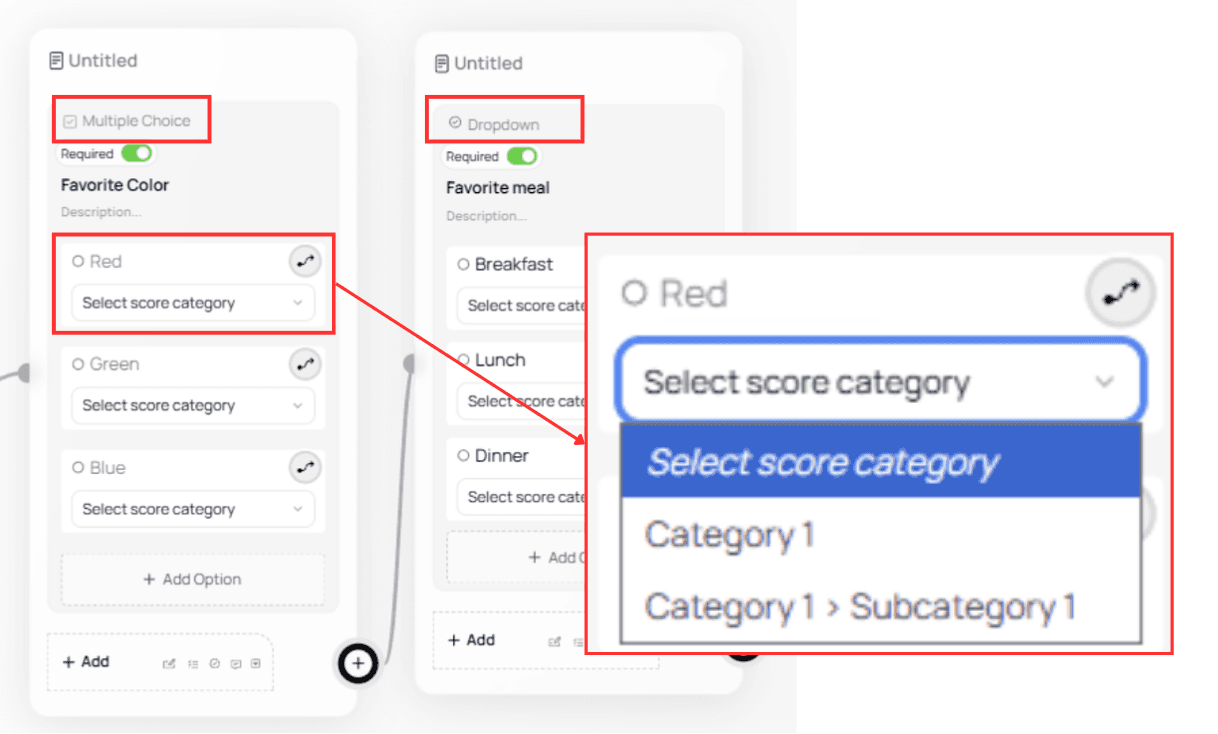
This allows your form to group user responses based on your scoring model.
Configuration Options
You can structure your scoring system in three ways:
Main Categories Only
(e.g., Heart Risk, Lung Risk, Skin Risk)One Main Category + Only Subcategories
(e.g., Heart Risk → Low / Medium / High)A Mix of Both
Most flexible model and recommended for complex assessments
Practical Example: Lifestyle Health Risk Assessment
Below is a practical demonstration using both categories and subcategories.
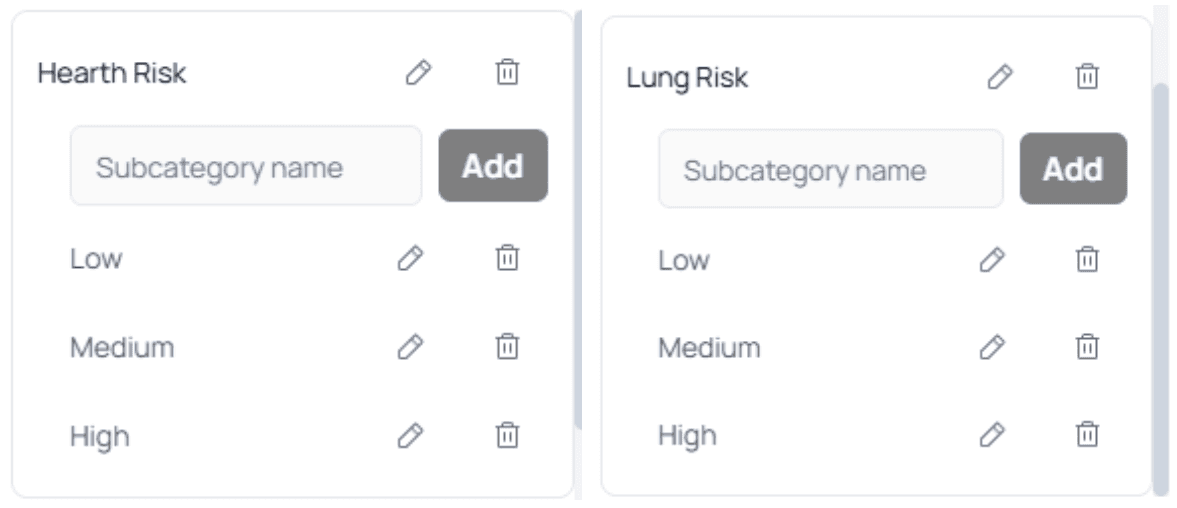
Define Your Main Categories
Example:

Add Subcategories
Each category has three risk levels:
- Low
- Medium
- High
ℹ️ Note:
When you have many categories or subcategories, the panel becomes scrollable.Assign Categories to Questions
Assign each option in your questions to one of the risk levels.

Build Conditional Logic Based on Risk Levels
Add a Conditional Split to route users based on their scoring outcome.
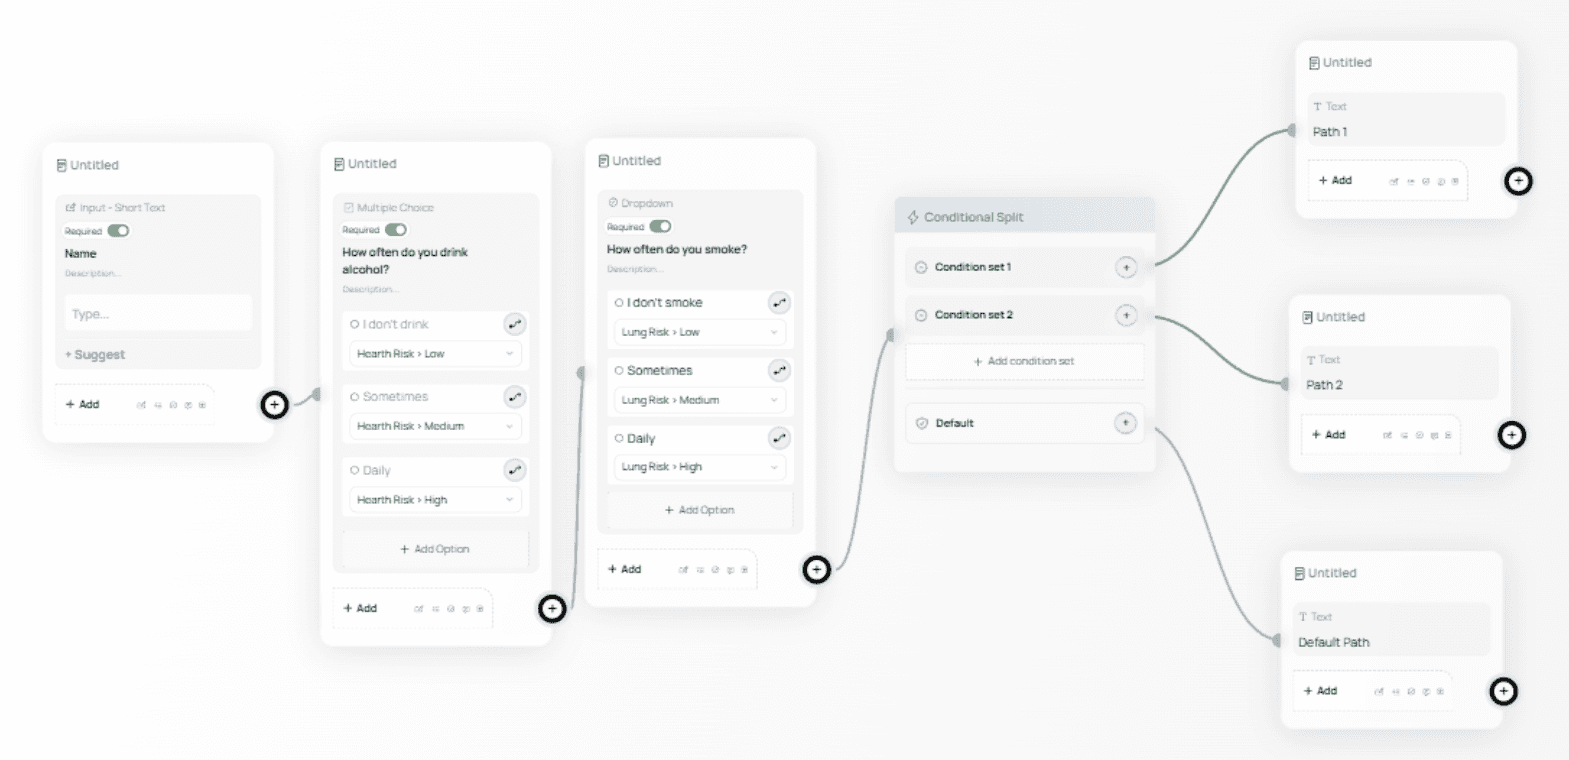
Each path shows a different message depending on the user’s combined risk results.
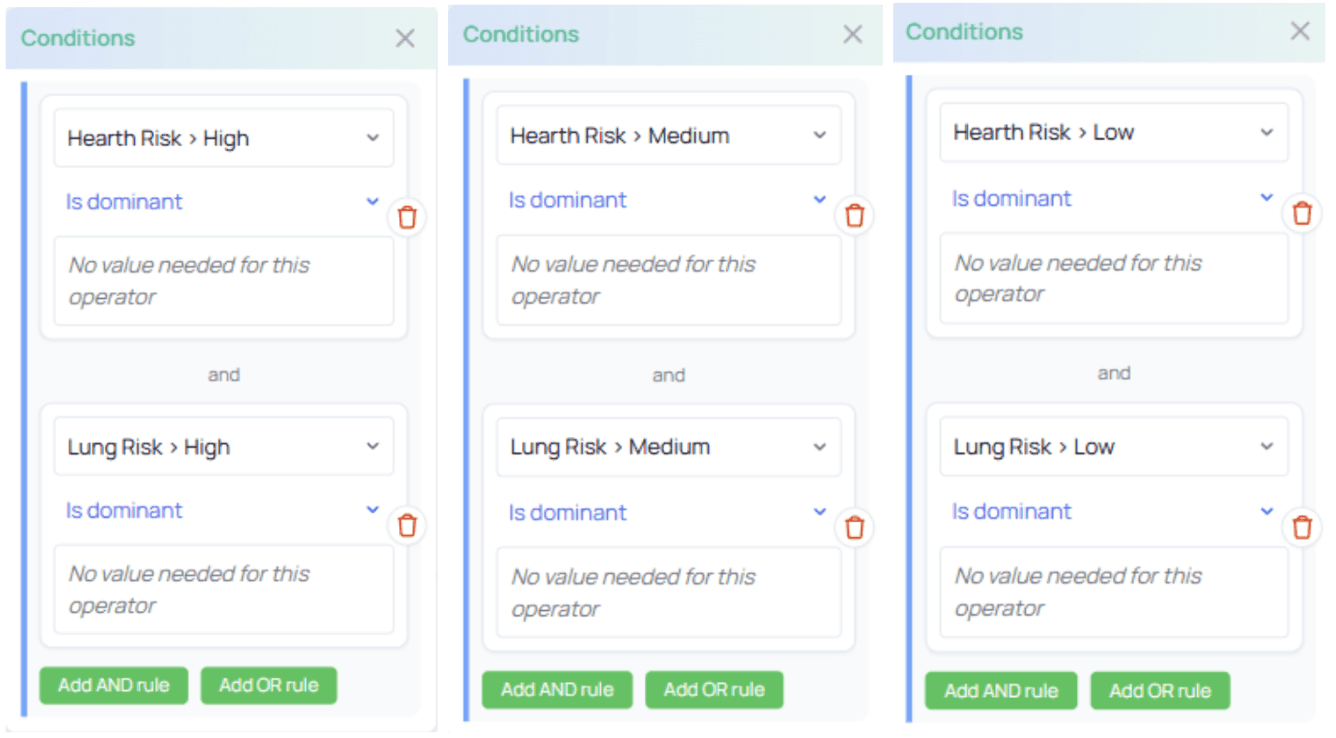
Define Specific Scenarios
In this example, we evaluate two categories: Heart Risk and Lung Risk, and target three scenarios:
High Heart Risk & High Lung Risk
Medium Heart Risk & Medium Lung Risk
Low Heart Risk & Low Lung Risk
Display a Custom Message for Each Scenario
Each outcome leads to a tailored message using Text nodes.
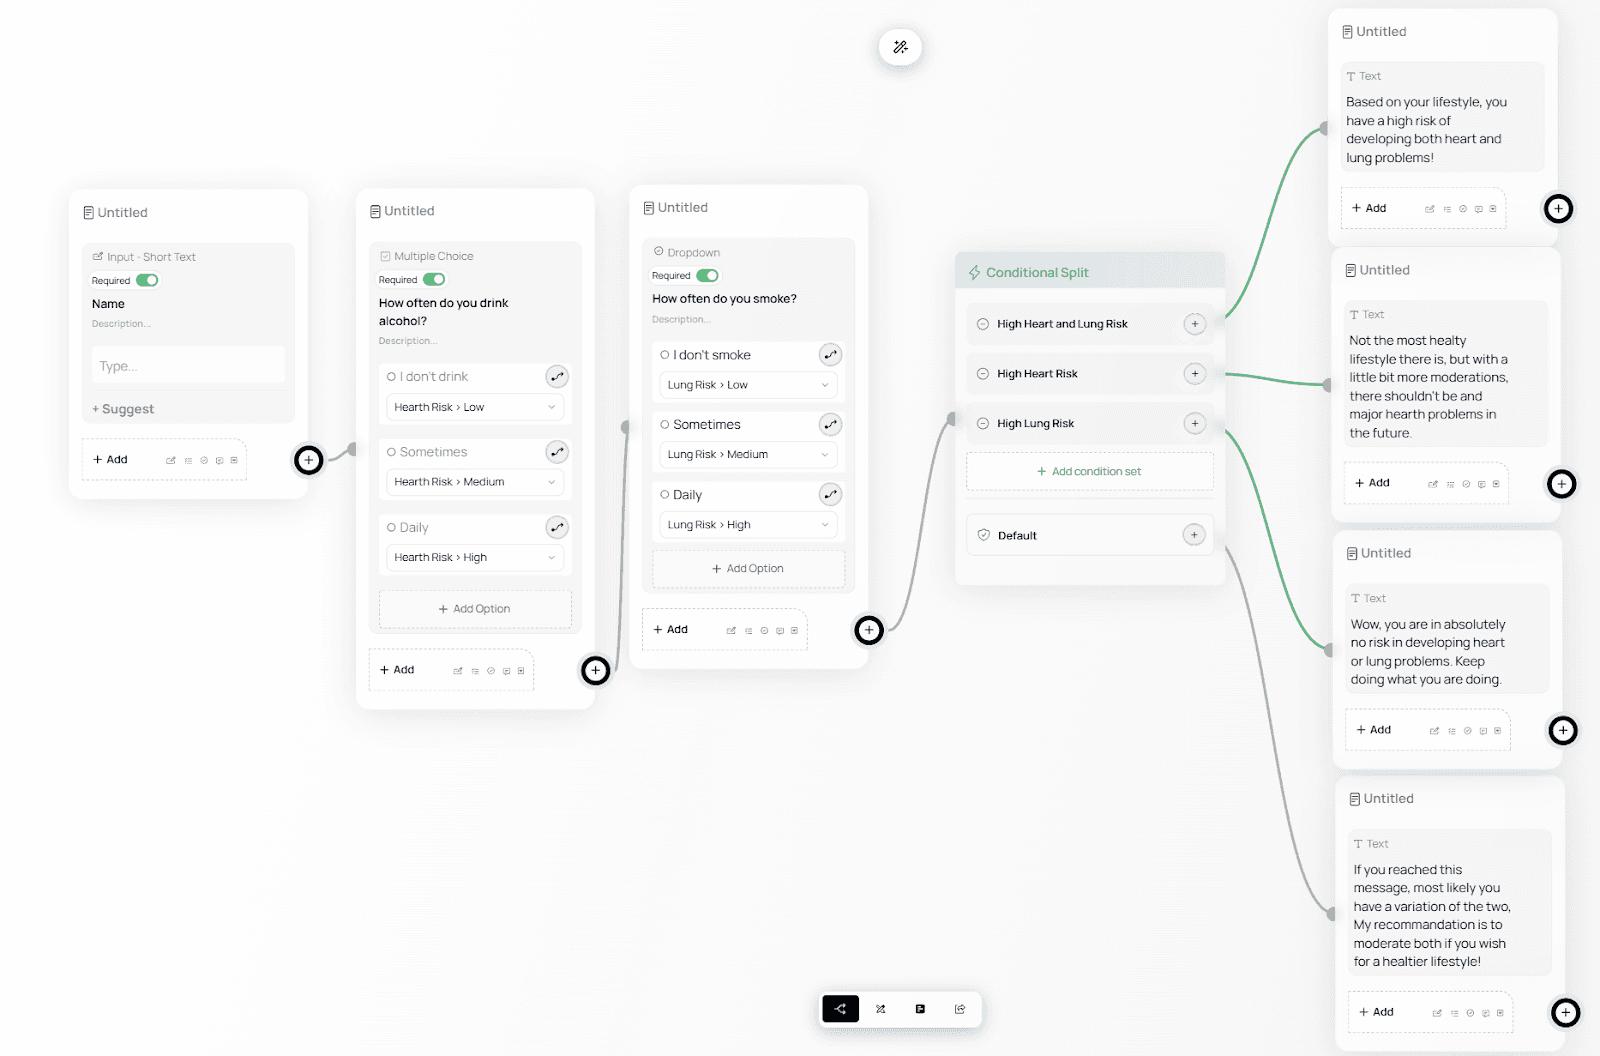
This completes the form — users now receive personalized recommendations based on their selections.