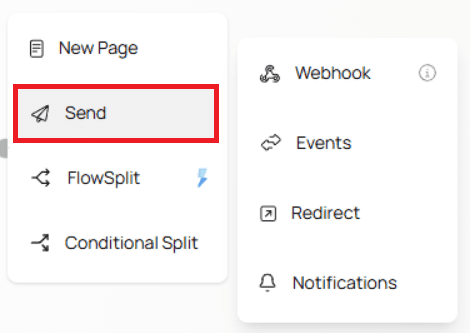
Send Node Overview
The Send menu contains several action-based nodes that allow you to send data to external platforms, display redirects, or notify users after form submission.
These nodes are used at the end of a flow or as part of automation within your form.
Below is a breakdown of each Send node and how it works.
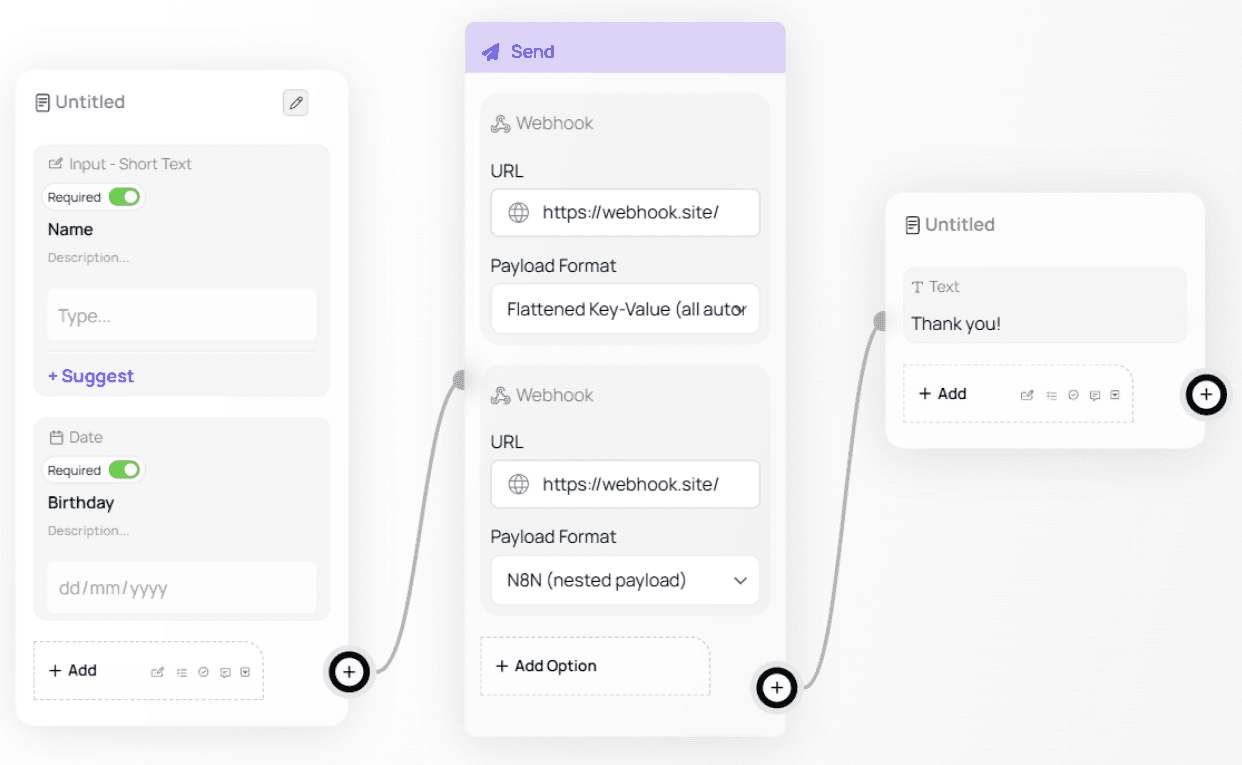
Webhook
The Webhook node sends your form data to an external platform via a POST request.
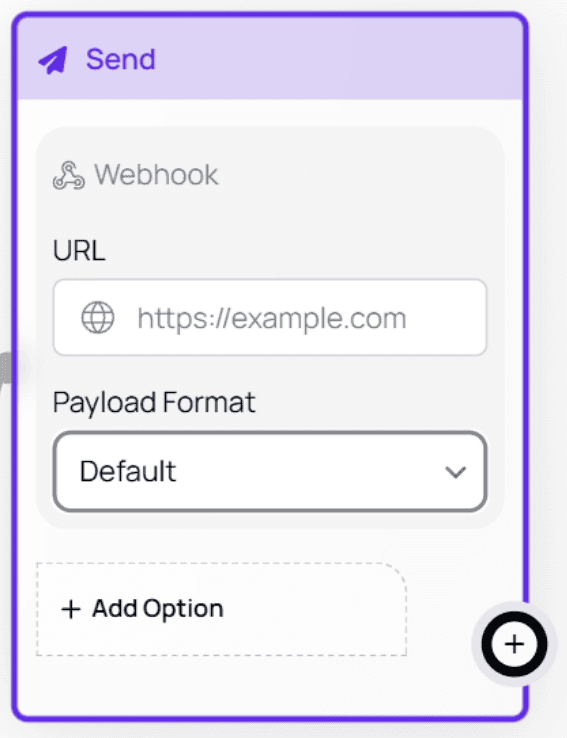
URL
Enter the endpoint where you want to send the data.
This is typically a server URL, automation platform URL, or third-party service.Payload Format
Choose how the form data will be structured before being sent.
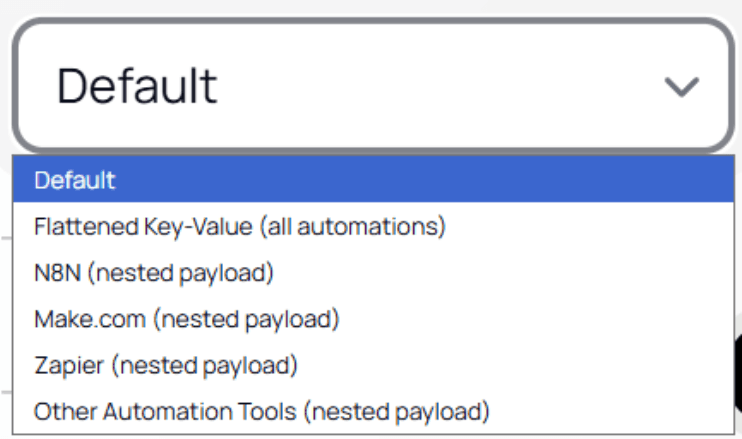
💡 Recommended:
Use Flatten Key–Value format.
It is the most consistent across platforms and reduces parsing errors.Payload Examples
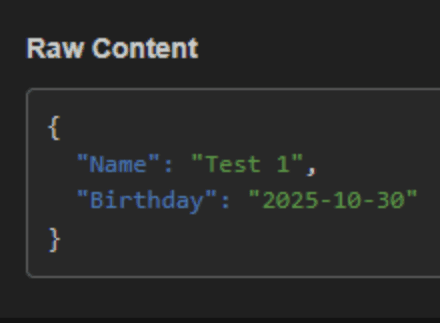
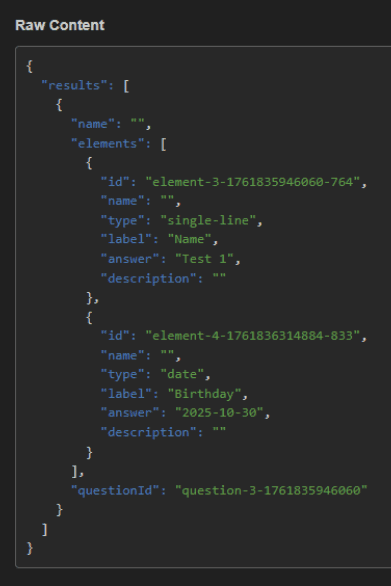
Below is how the same form submission appears when sent as Flattened vs Nested, using https://webhook.site/ for demonstration.
Example Form:
Flattened Key–Value:
Nested Payload:
ℹ️ Tip:
Flattened data is easier to map in tools like Zapier, Make, Pipedream, and other no-code automation platforms.Additional Webhook Resources
For a full walkthrough on how to set up and use Webhooks in Formflow — including a step-by-step video guide — you can refer to our dedicated documentation page:
👉 How to Use Webhooks in Formflow
This resource covers practical examples, testing tips, and common use cases to help you get the most out of Webhooks.
Events → Meta
This node allows you to connect events to your Meta Business Account.
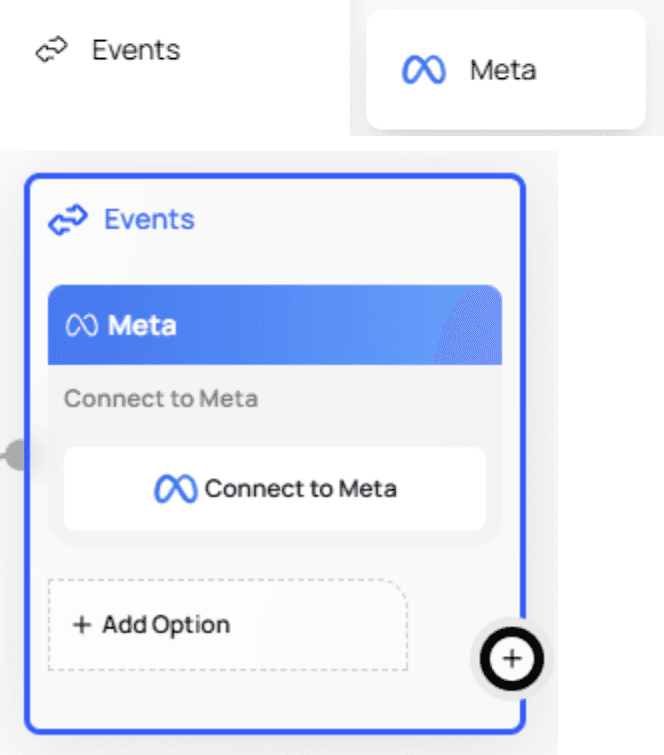
⚠️ Note:
This feature is currently a work in progress, and not all functionality is available yet.Redirect
The Redirect node is a Terminal Node.
When the user completes the form, they are automatically redirected to the URL you specify.
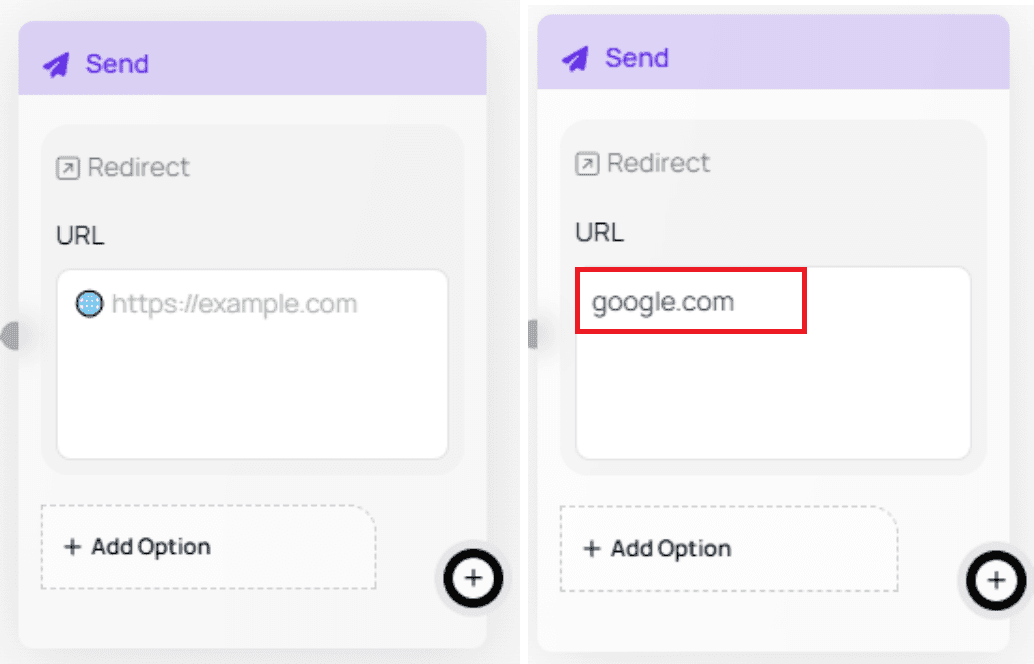
💡 Use Case:
Perfect for survey thank-you pages, booking confirmations, payment pages, or directing users to your website after submission.Notifications (SMS & Email)
These nodes allow you to send customized notifications to your users based on their form responses.
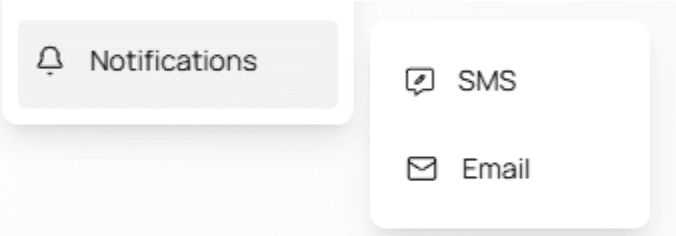
A. SMS Notifications
In the Recipient input, specify the phone number that should receive the SMS.
You can use:
A static phone number
@Mentions to dynamically reference the user’s phone number entered in the form
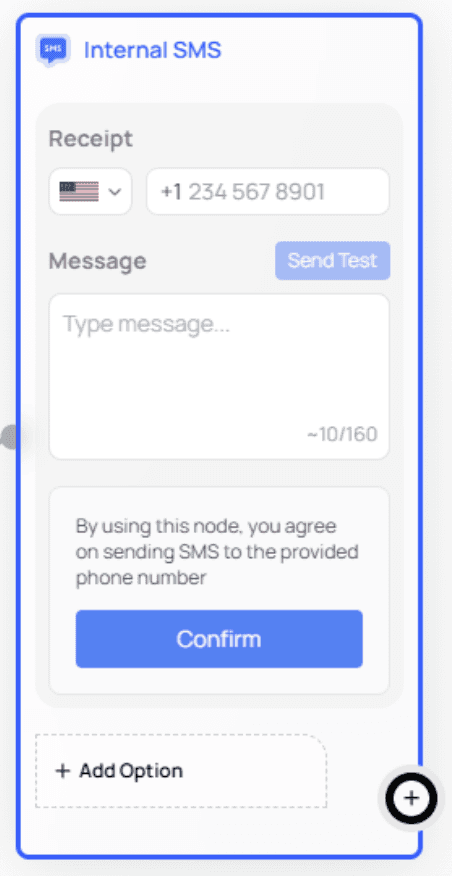
The Message field lets you compose the SMS text.
Testing SMS
To test your SMS setup:
Add a phone number
Add a message
Click Send Test
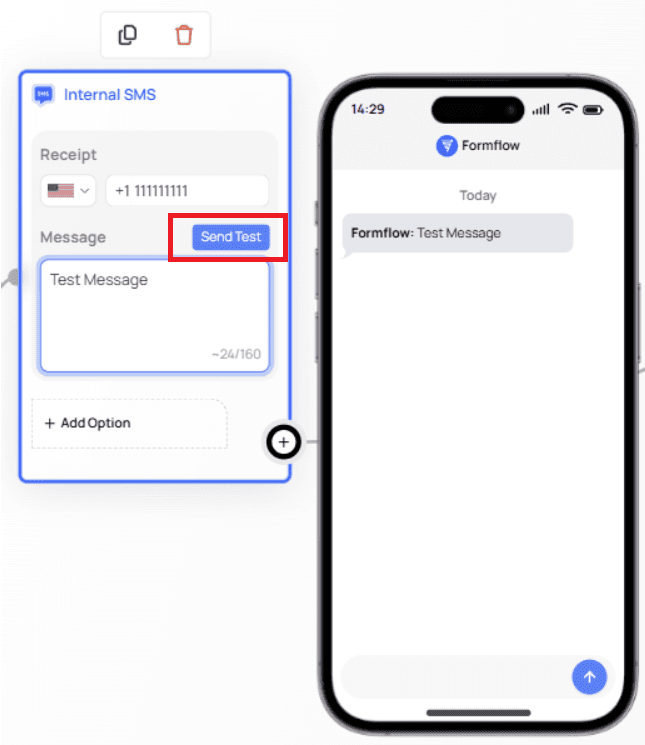
⚠️ Important:
Test SMS messages may incur additional charges depending on your provider.B. Email Notifications
The Email Notification node has three components:
To — recipient email(s)
Subject — the email title
Message — the body content
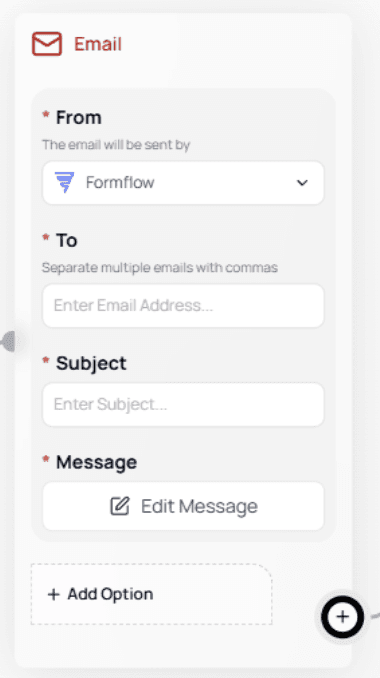
To edit:
To and Subject → click and type like any other Canvas input
Message → click Edit Message to open a rich text editor
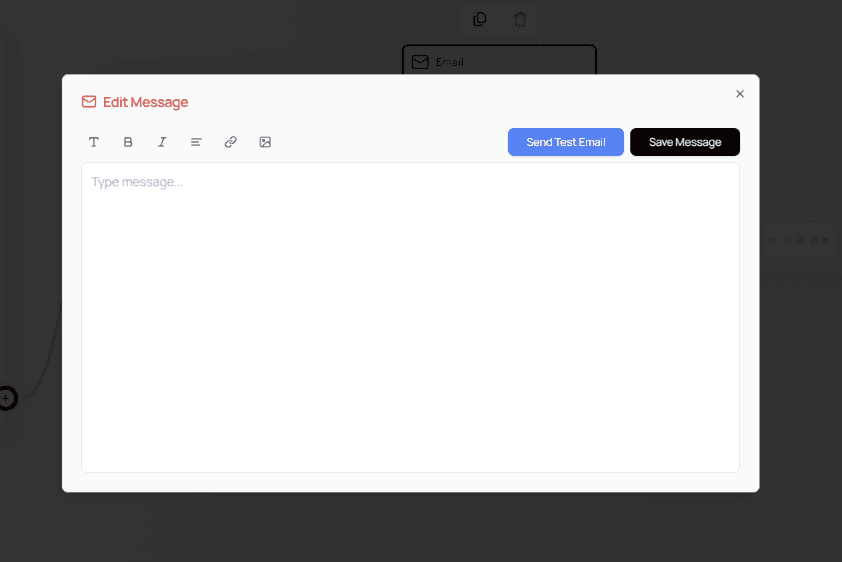
Sending a Test Email
Add a test email address, then click Send Test Email.
⚠️ Important Note:
Test emails may fail or go to spam if:The subject line is missing
Your email provider flags Formflow as unverified
You previously opted out of receiving emails from Formflow
💡 Tip:
Add your domain to your email provider’s safe sender list to improve deliverability.Additional Email Node Resources
If you’d like a full walkthrough of how the Email node works — including examples, best practices, and a video guide — you can refer to the dedicated documentation page:
👉 How to Use the Email Node in Formflow
It’s highly recommended if you want a detailed, visual guide to the Email Notification workflow.
🎉 You’re All Set!
The Send menu gives you powerful options to connect Formflow to external platforms, automate communication, and end flows cleanly.
Next steps you may want to explore:
FlowSplit (Logic Branching)
Conditional Split
Scoring Systems
Publishing & Sharing